Using the web admin panel
Paddler comes with a built-in web admin panel that offers a convenient way to manage your Paddler cluster and understand its status. It gives an overview of all of your agents and other services running in the cluster, allows you to select the model and manage the inference parameters, and provides a chat interface to easily test your setup.
Enabling the web admin panel
You can enable the web admin panel when starting the balancer by adding the --web-admin-panel-addr flag followed by the address and port where you want to access the panel from.
Let's continue our example of setting up the basic LLM cluster locally, and start the balancer with the web admin panel enabled on port 8062:
Next, navigate to 127.0.0.1:8062 in your web browser to access the panel. The first thing you'll see is the panel's Dashboard, showing you your current cluster setup.
Navigating the web admin panel
The web admin panel consists of the following sections:
Dashboard
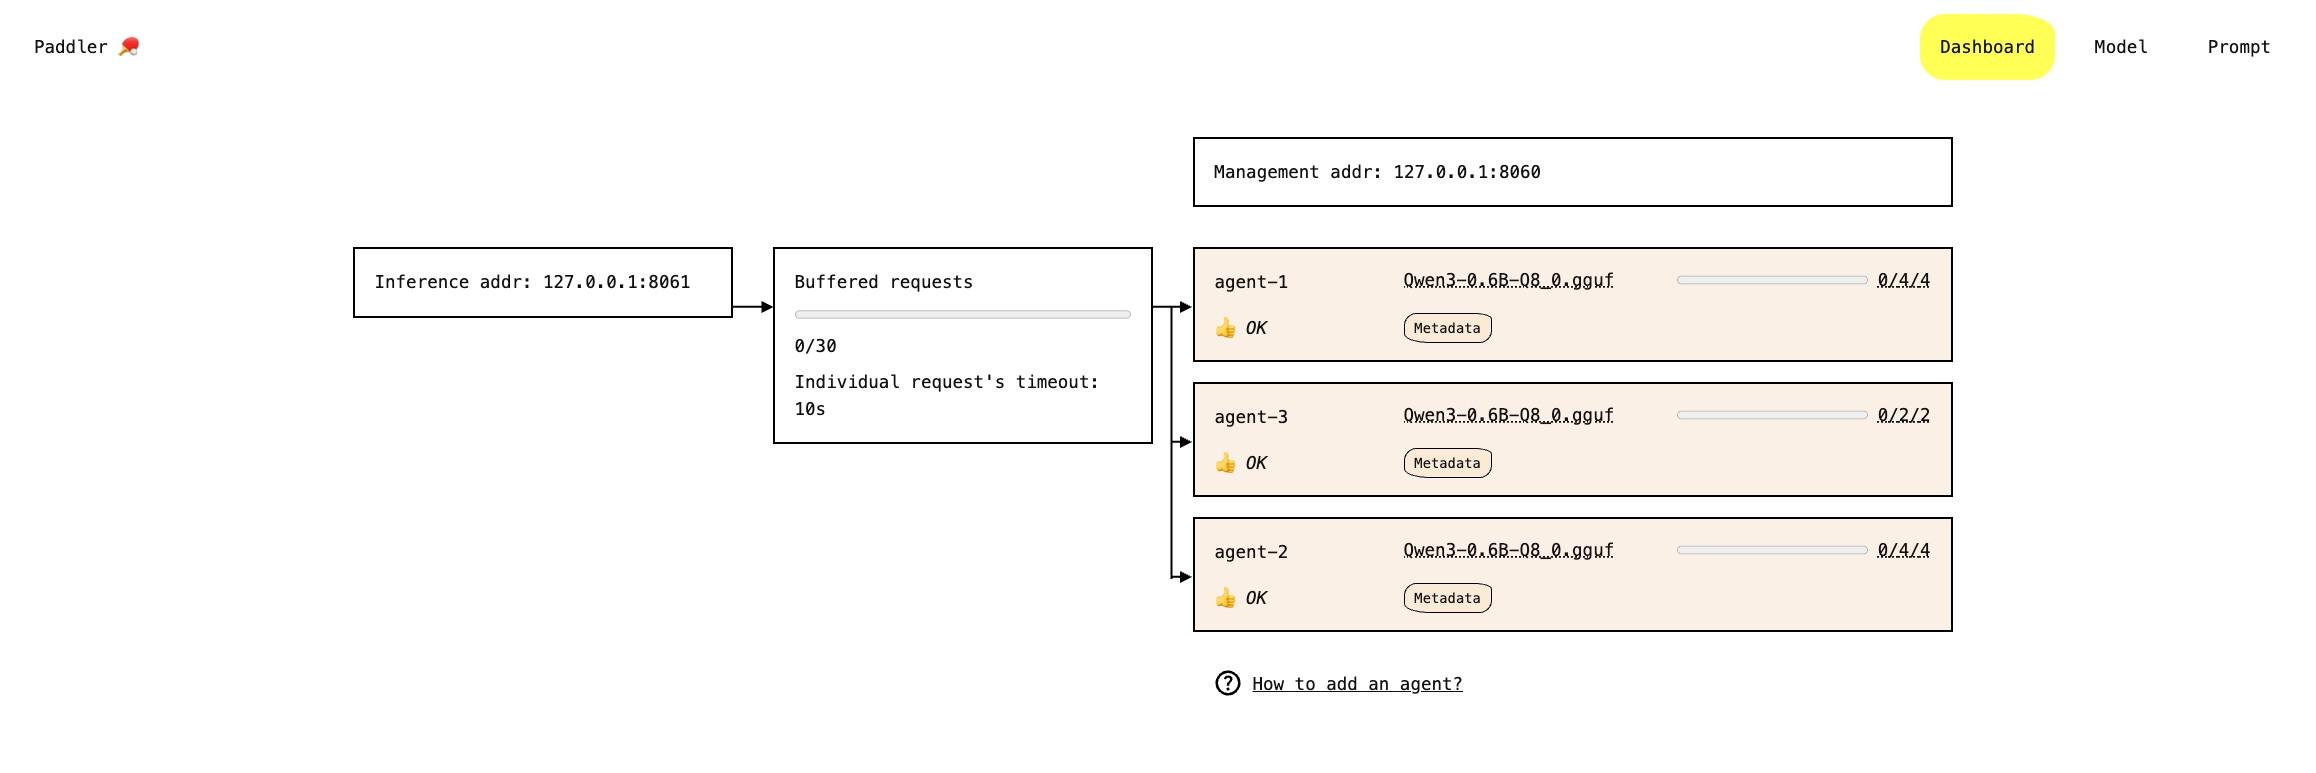
This is the main page that gives you an overview of your cluster, including all of the agents you started. Specifically, you will see:
The current address and port of the inference service (used by applications that connect to it to obtain tokens or embeddings)
The current address and port of the management service (which controls the whole Paddler setup)
The status of the buffer, including how many requests are currently in the buffer, the maximum number of requests the buffer can take, and the maximum time each individual request can stay in the buffer before it times out. Buffering requests is an important feature of Paddler, discussed in more detail in the Buffering requests page.
A list of all agents currently connected to the management service, including their names, the number of slots, and the model and its metadata.
The dashboard is a living creature. It reflects the changes in your cluster in real-time, especially the number of requests that the buffer currently holds, and the current usage of slots.
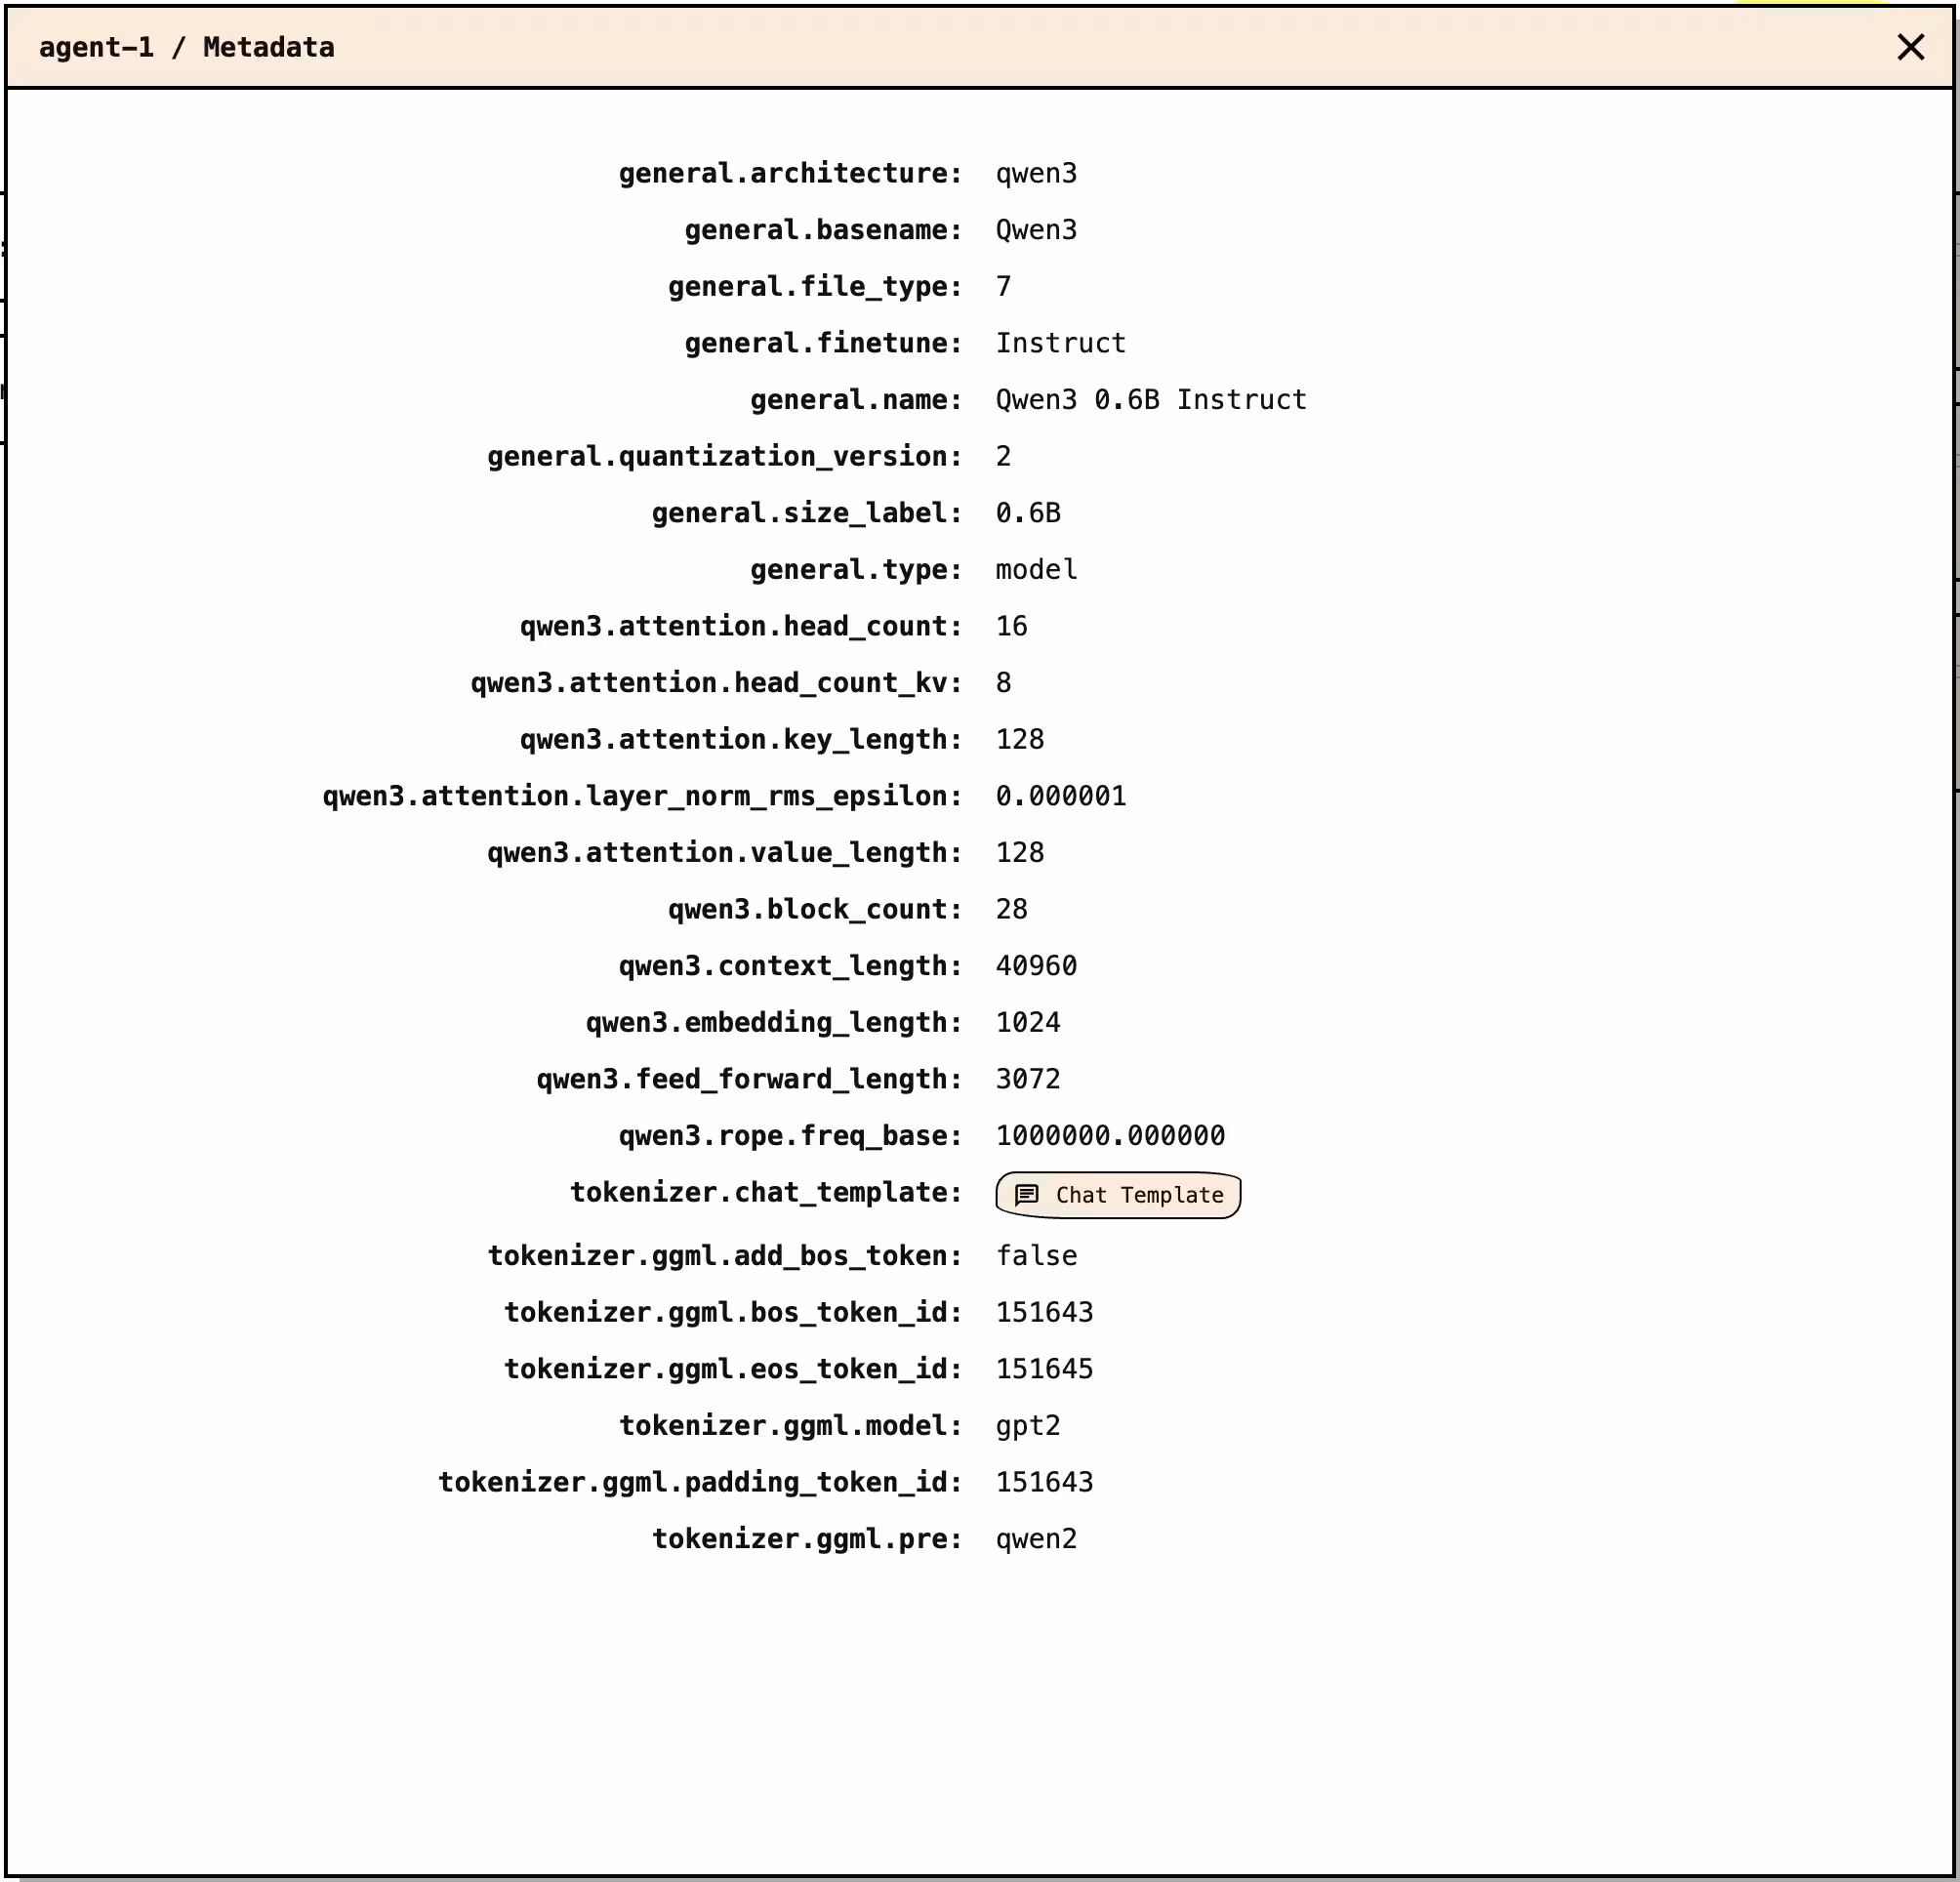
Once you have a model added, you will also see the model name and its metadata next to each agent (click the "Metadata" button to preview it).
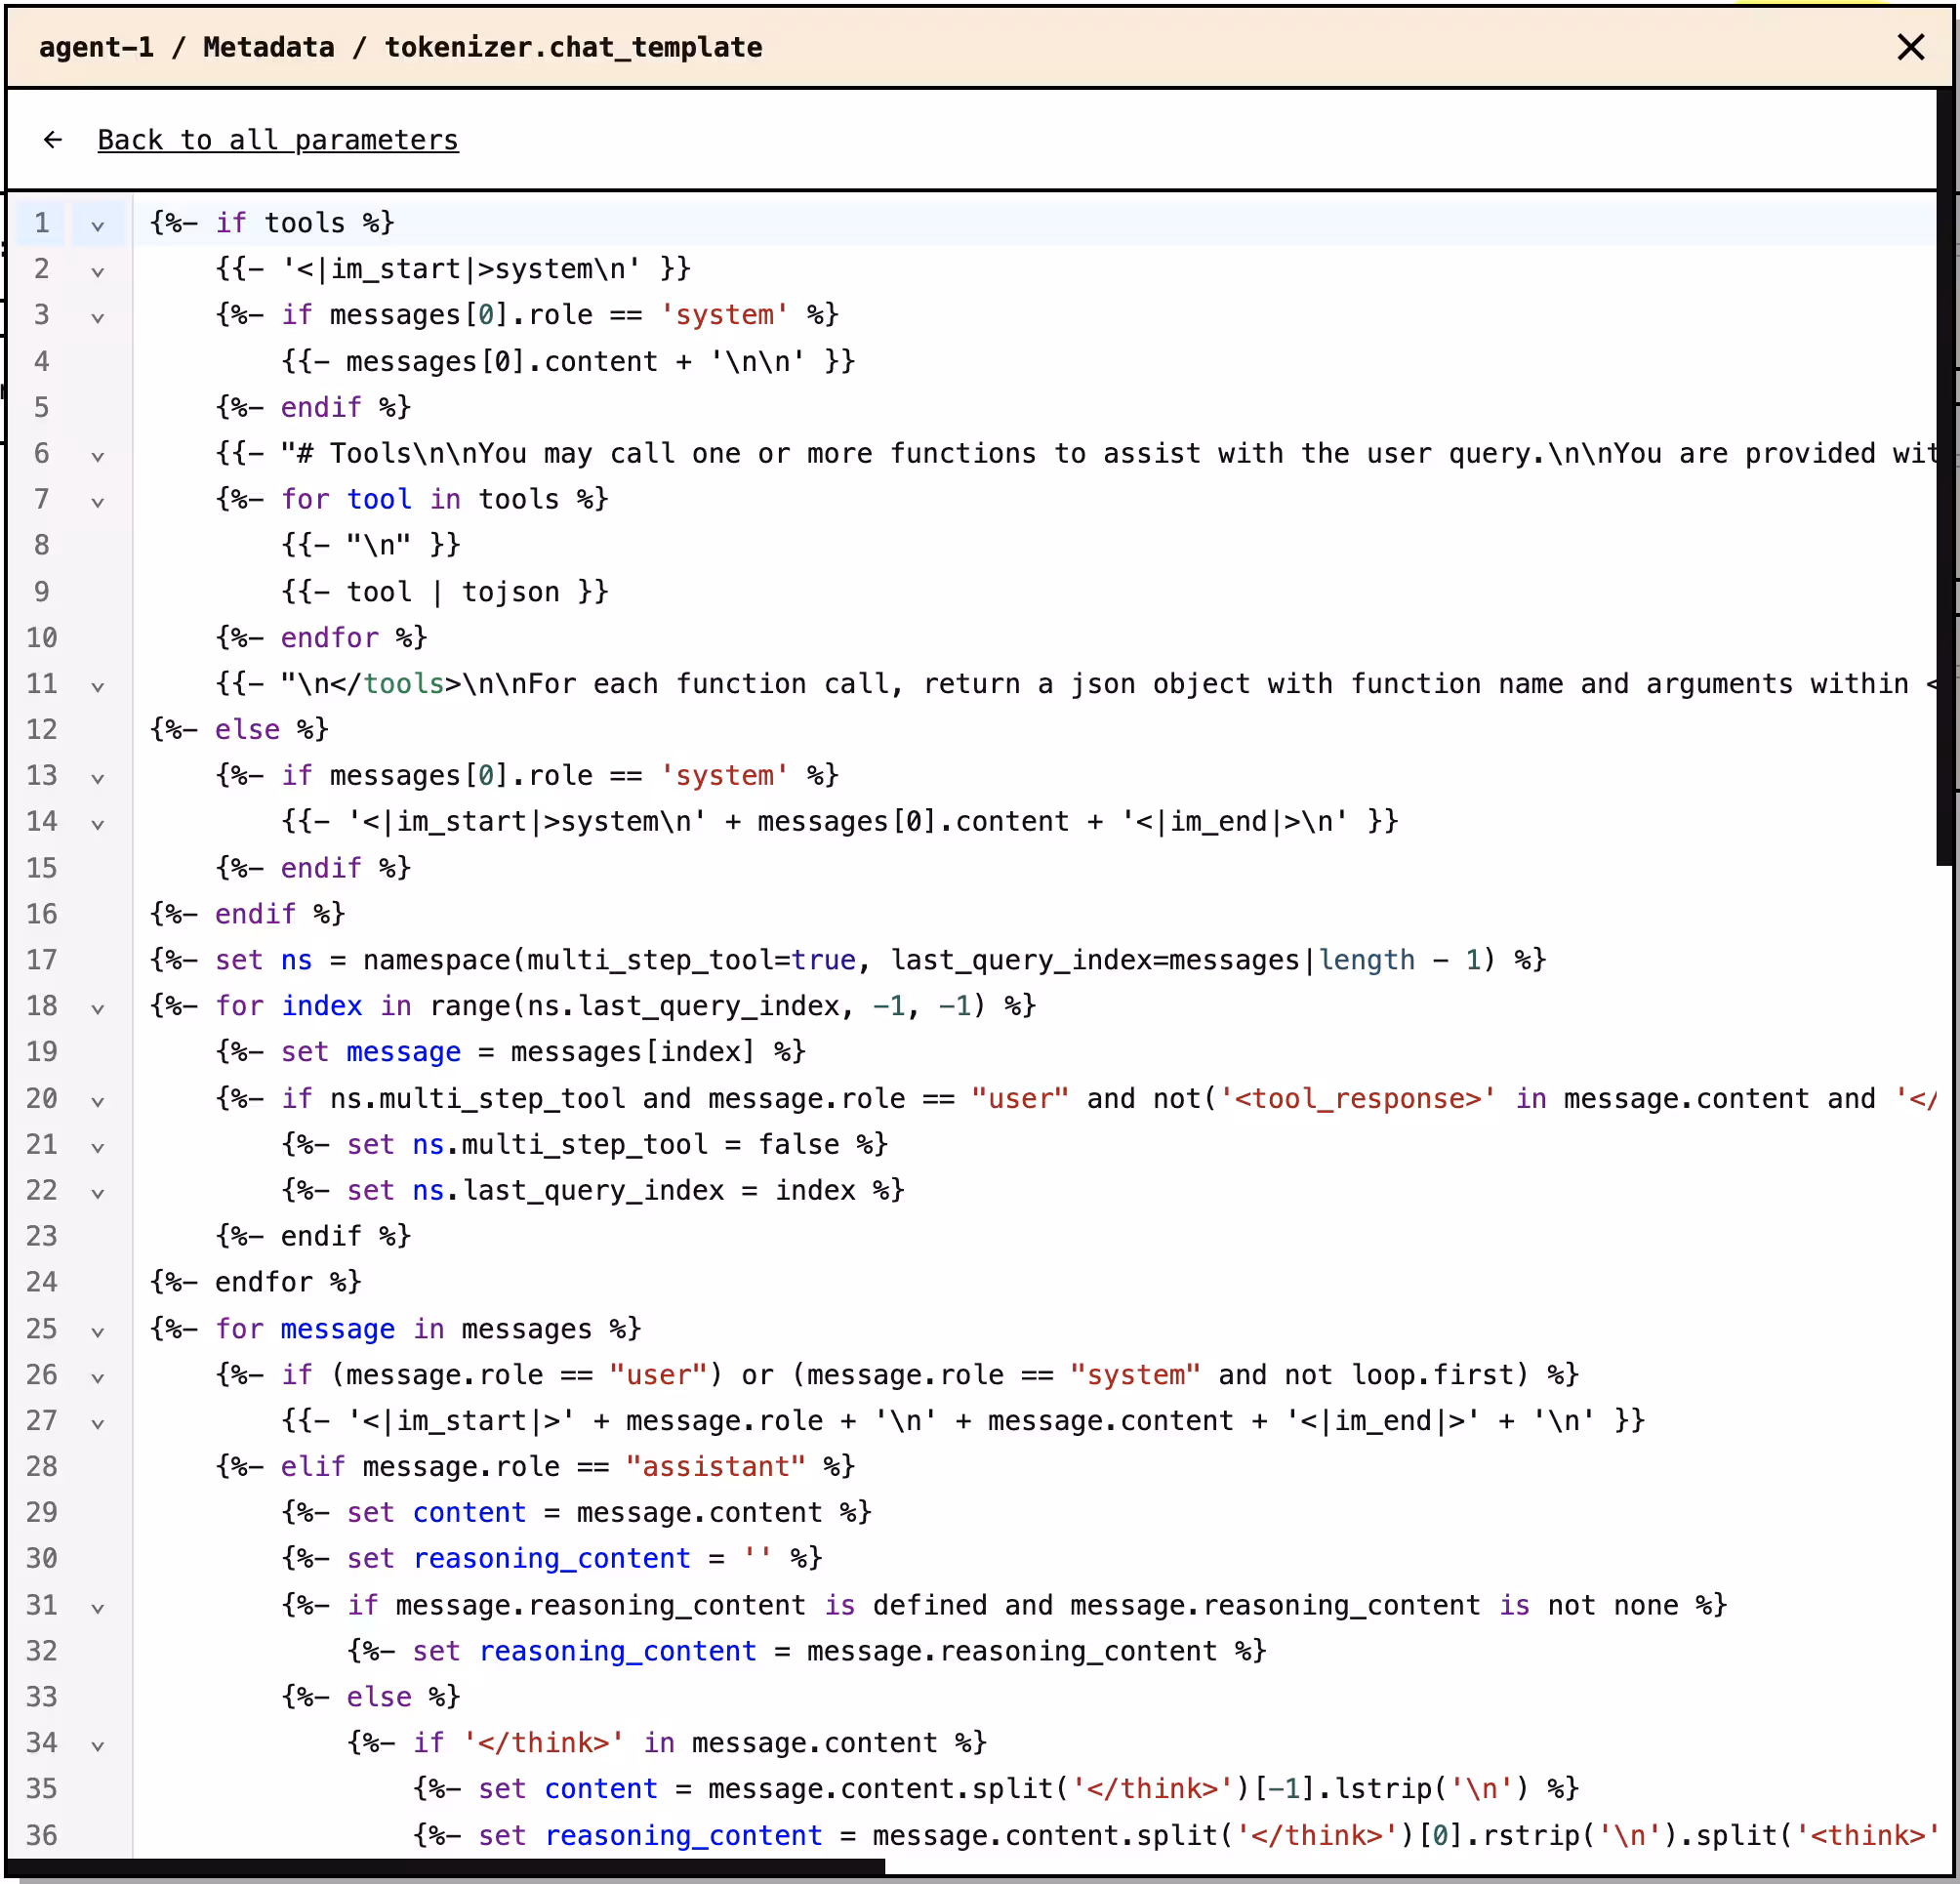
If the model you're using contains a chat template, you can preview the template's content by clicking the "Chat template" button inside the model metadata dialog.
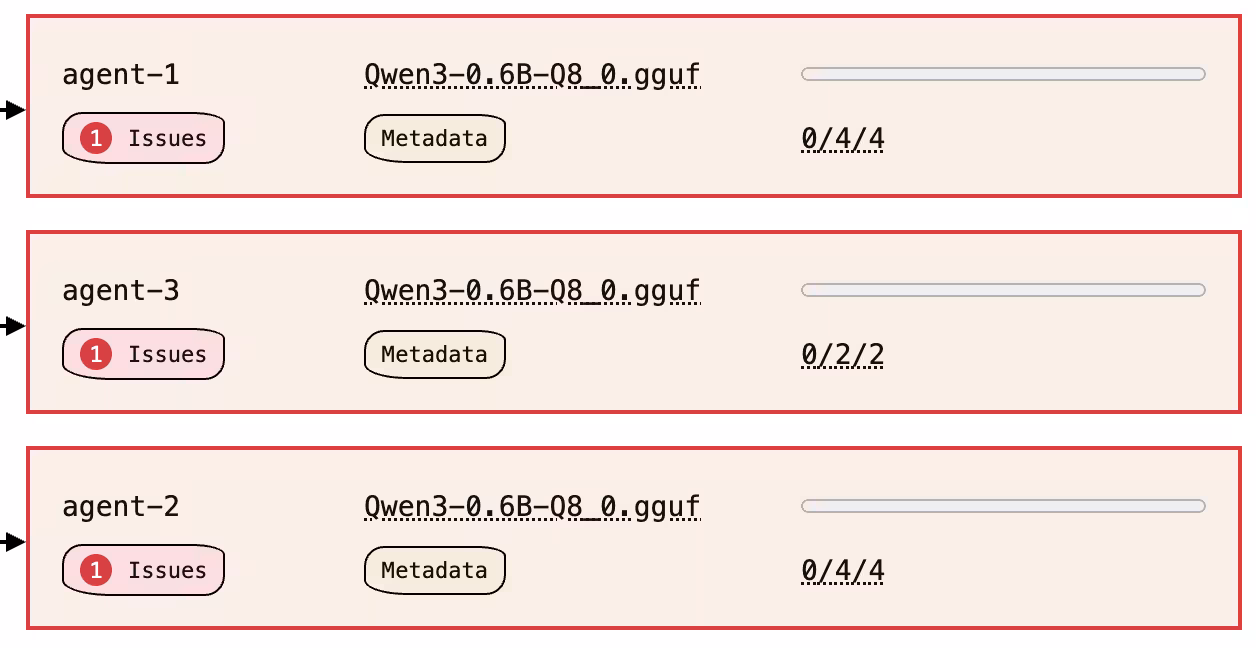
Finally, if there are any issues with processing the requests, you see an "Issues" button next to the affected agent. Clicking it gives you more info you can use to troubleshoot the problem.
Model
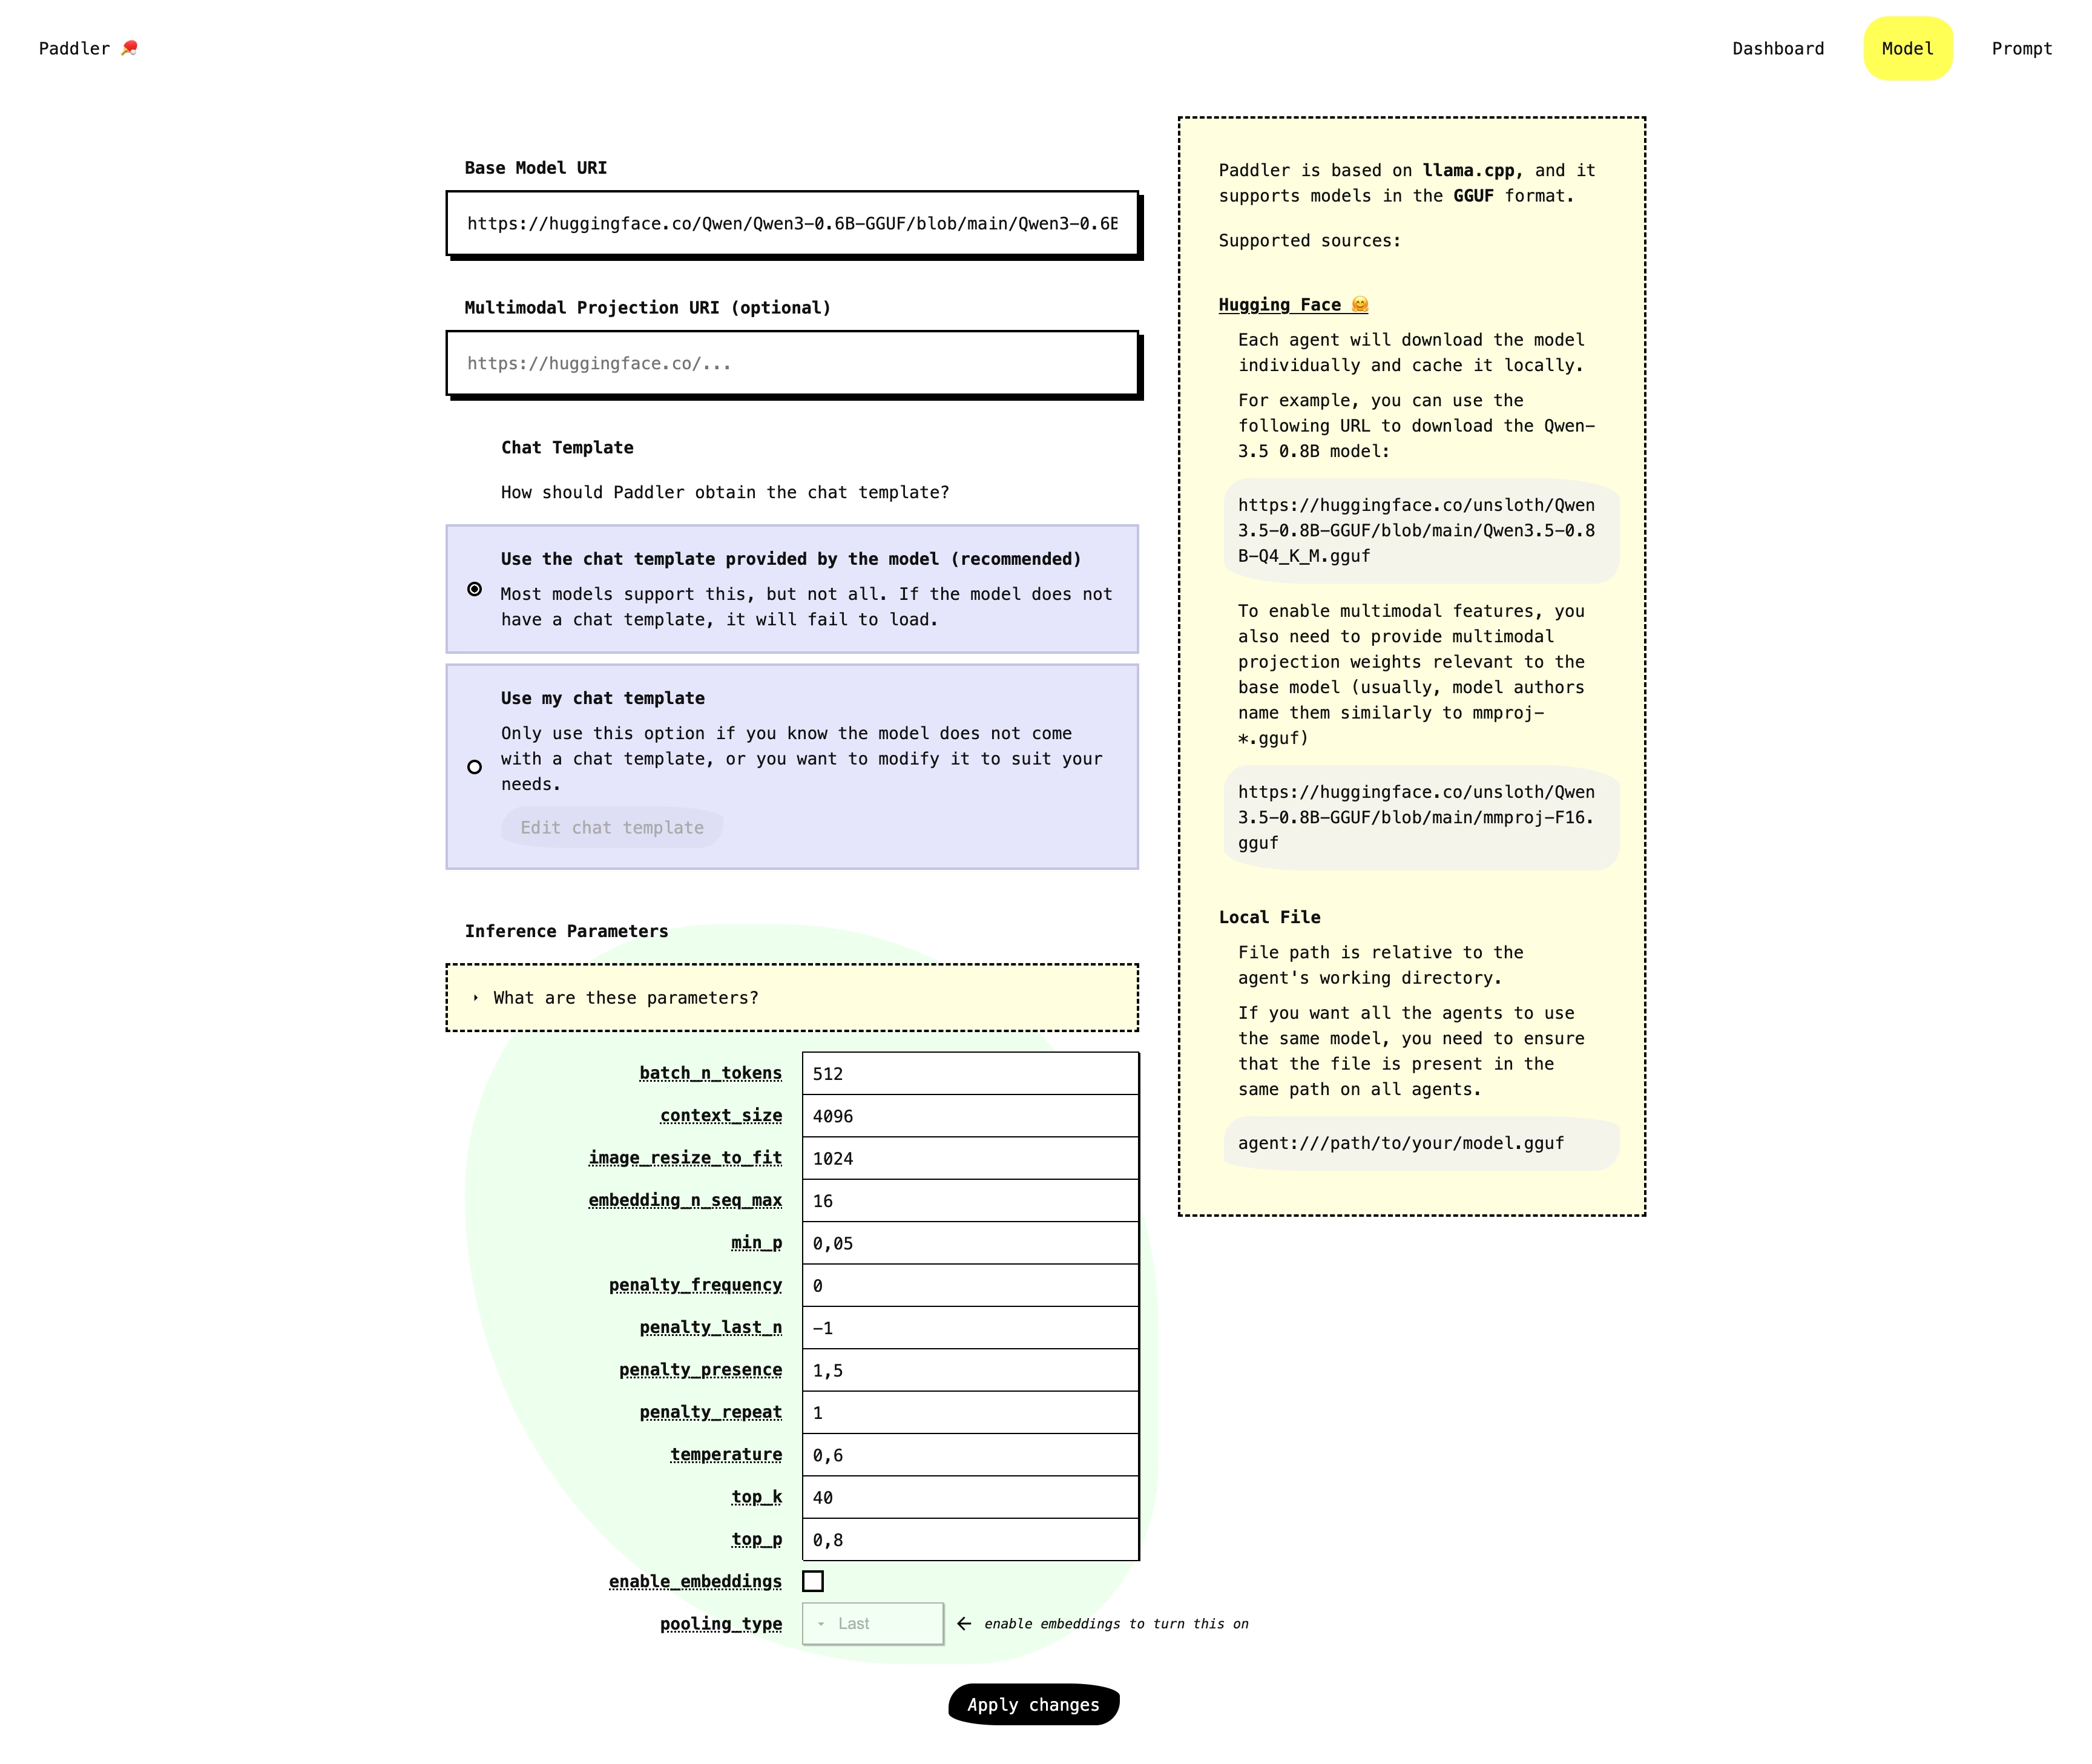
This section allows you to provide paths to the models you want to use. Paddler uses llama.cpp internally, so it supports all models in the GGUF format that llama.cpp supports. You can either provide a local path to the model file on your machine or a URI to the model on Hugging Face. If your model supports vision, you can also provide a multimodal projection file to enable adding images in conversations.
You also need to tell Paddler how to find the chat template for the model. You can either use a model that already provides the template, or you can add your own template when applying the model. Either way, properly configured chat templates determine whether the model produces meaningful responses.
Finally, Paddler allows you to customize the inference parameters for your model.
Prompt
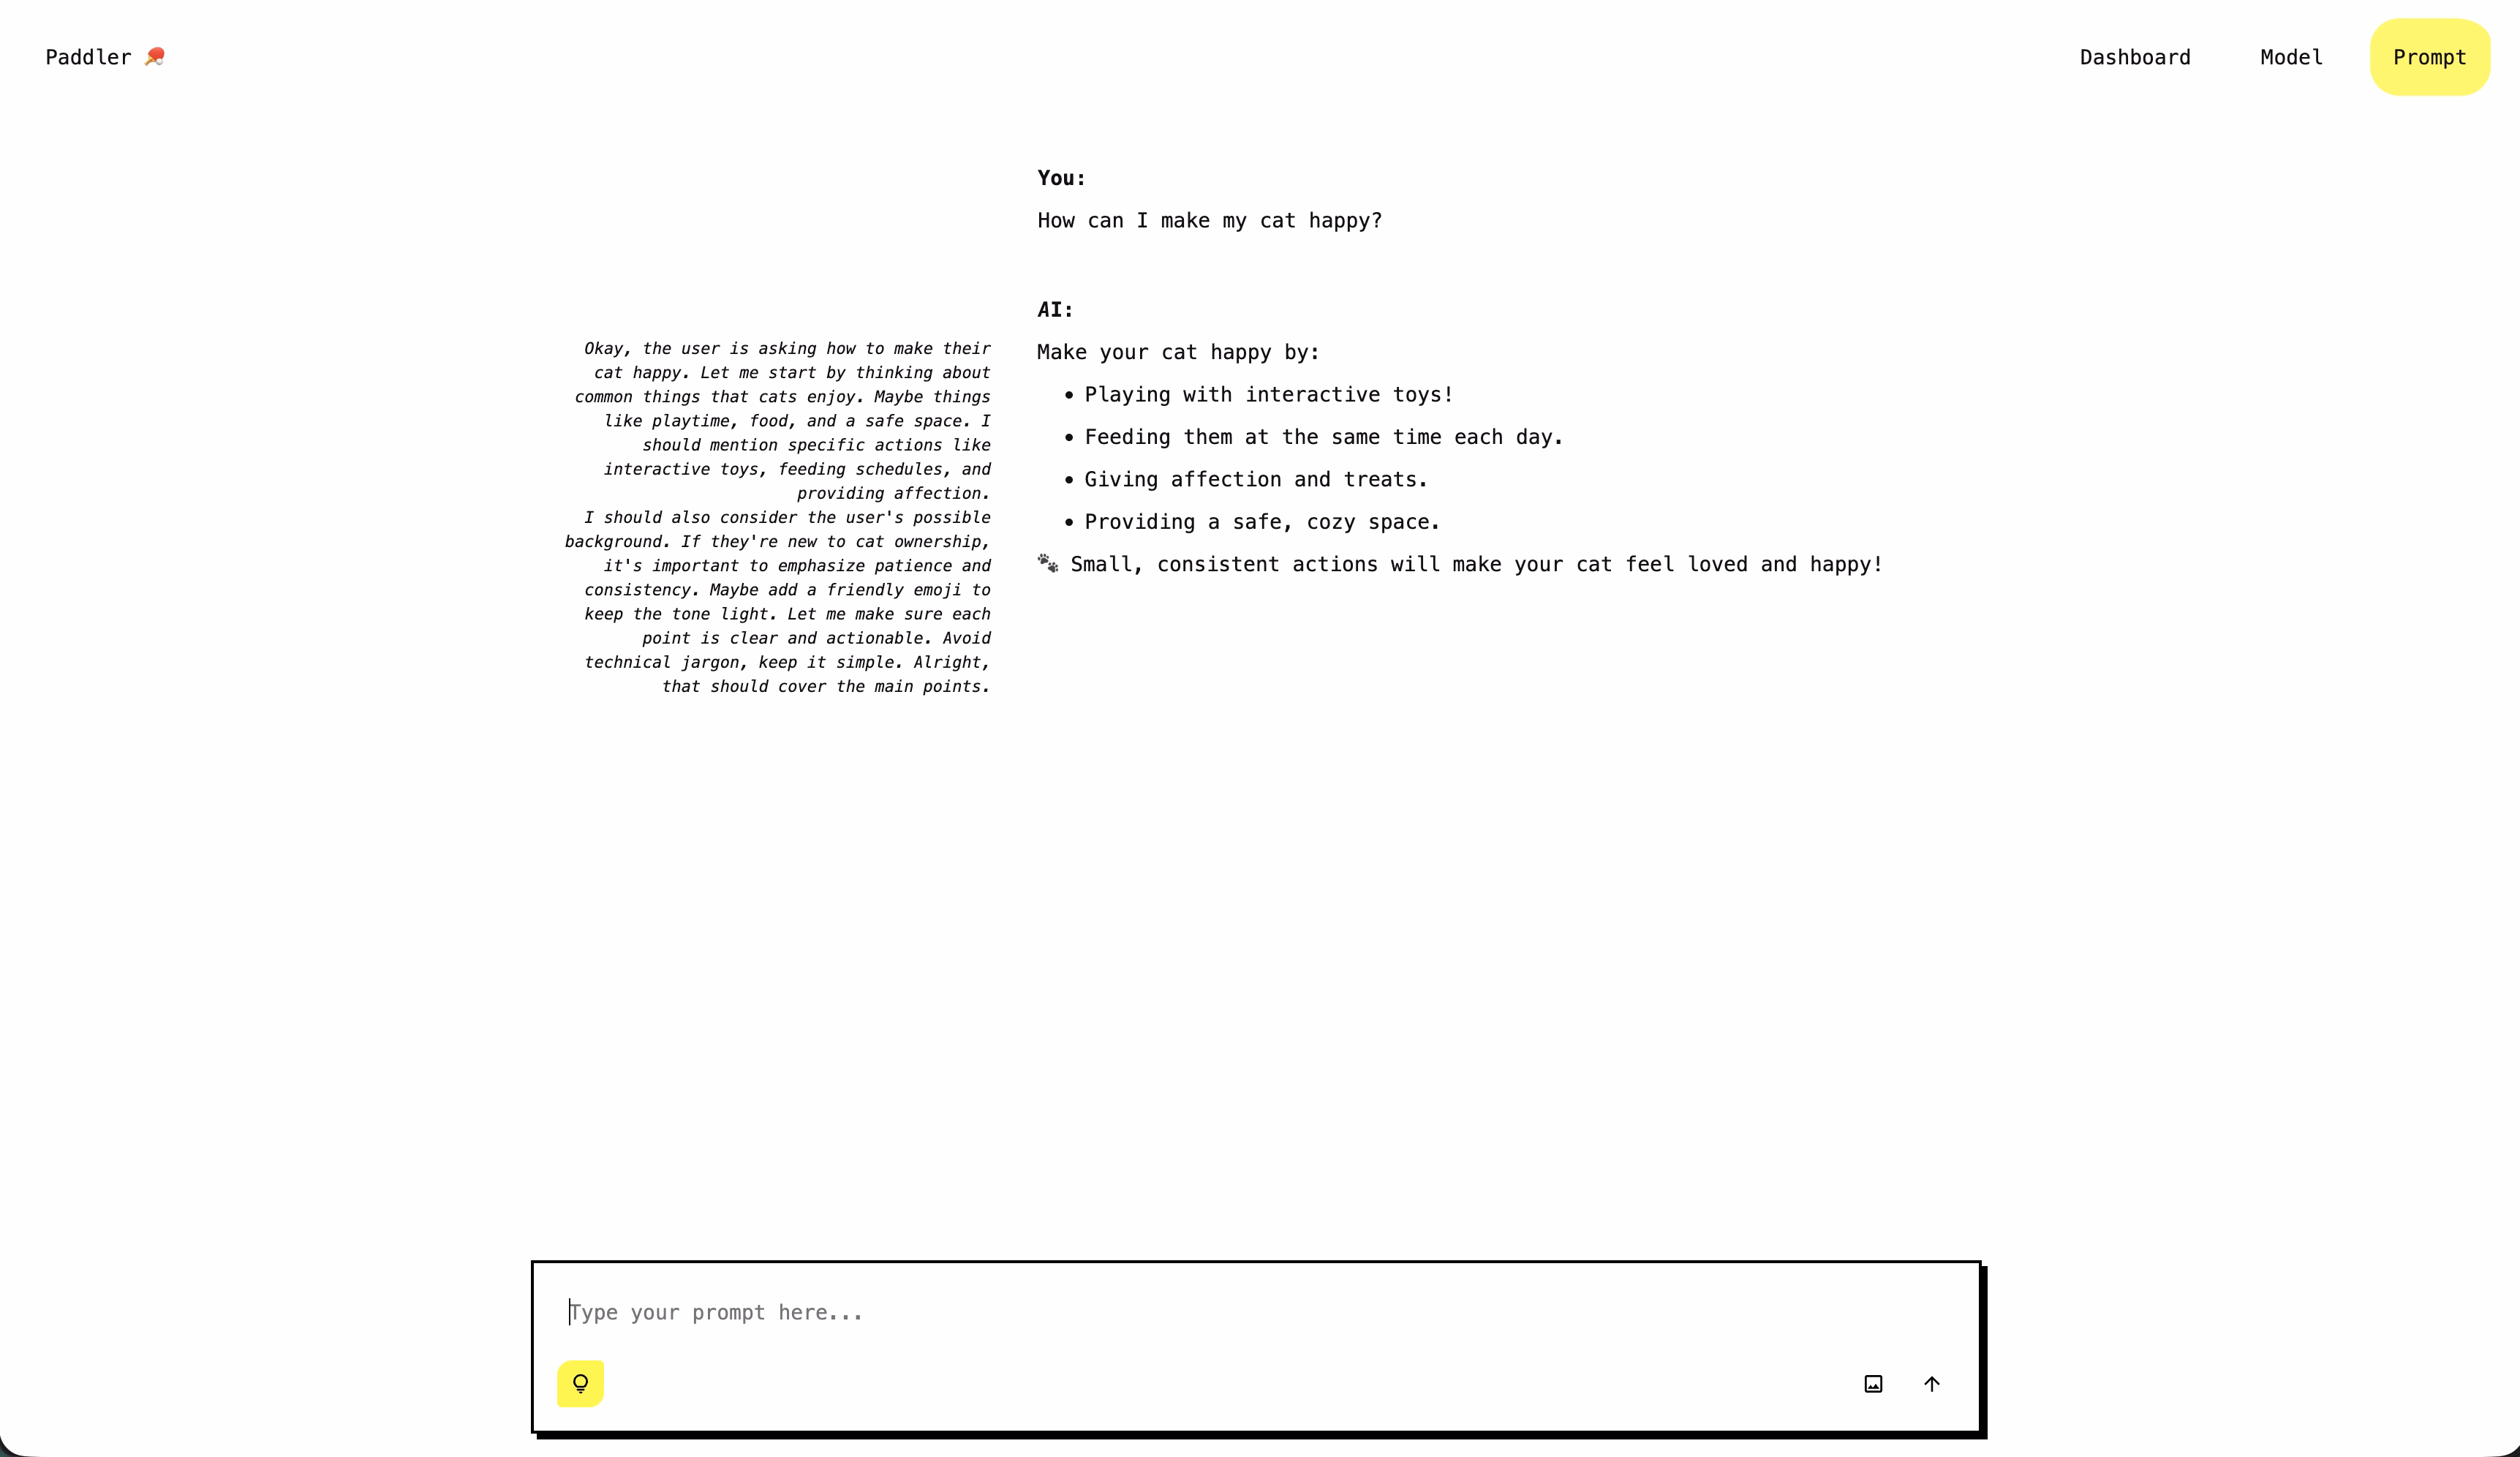
This section gives you a convenient GUI to test your Paddler cluster by sending actual inference requests. Open the Prompt section in one browser tab and the Dashboard in another. Send requests from the Prompt section, then watch the Dashboard process them in real-time.